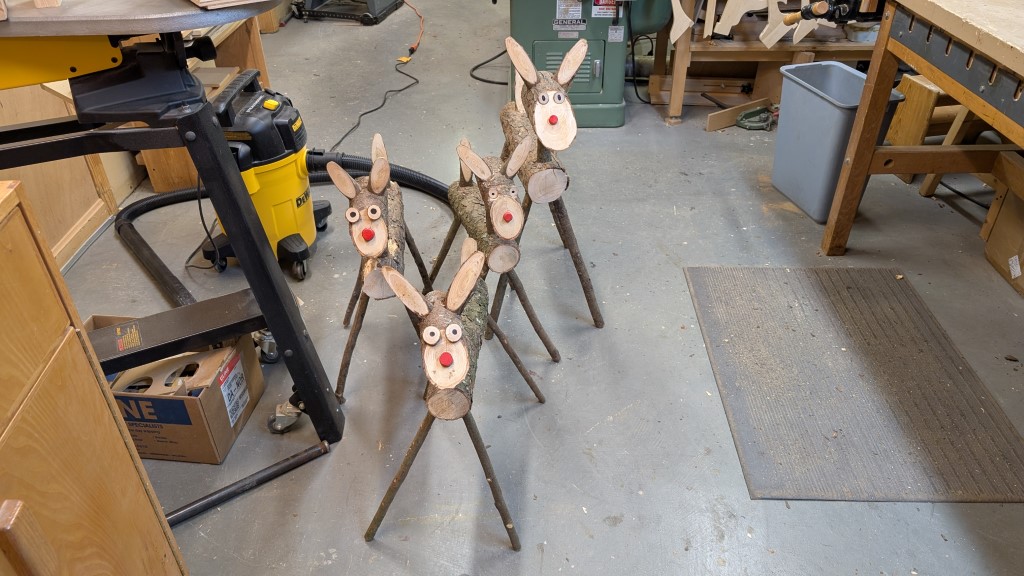
After building a single log reindeer named Rudy last year, I decided to get serious this past holiday season and crank out a bunch of other Rudy’s in the woodshop/reindeer factory. Why you ask? Well, I had time on my hands, I liked how Rudy livened up the yard, and the numerous branches and downed trees in a hedgerow behind the house provided lots of raw reindeer material. Also, I thought they would make good Christmas gifts. So, without further ado, I got busy and started building a bunch of log reindeer.
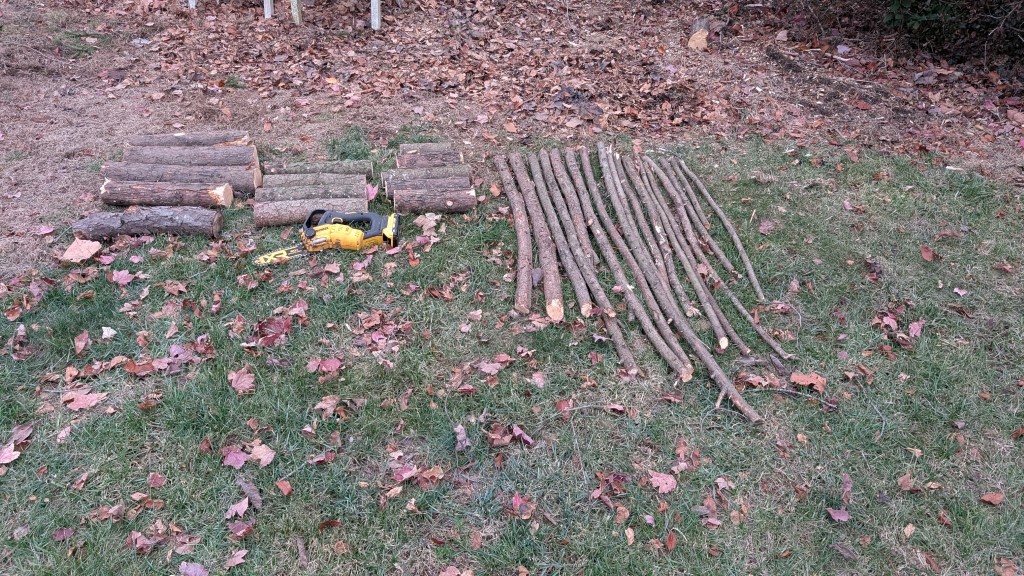
The first step was to assemble suitable logs and branches for the various body parts. For this, I headed out to a wooded area behind the house with my handy Dewalt battery-powered 8″ pruning chain saw. For the trunk/torso and head, I chose logs that were 4″ to 5″ in diameter. The torso logs were cut to either 14-16″ long for a small reindeer or 19″ for a large one. The heads were cut to a rough length of 6″ to 8″. The neck, ear, and tail parts were made from branches that were 1-1/4 to 1-1/2″ in diameter. For the legs, I chose 3/4″ to 1″ diameter branches.
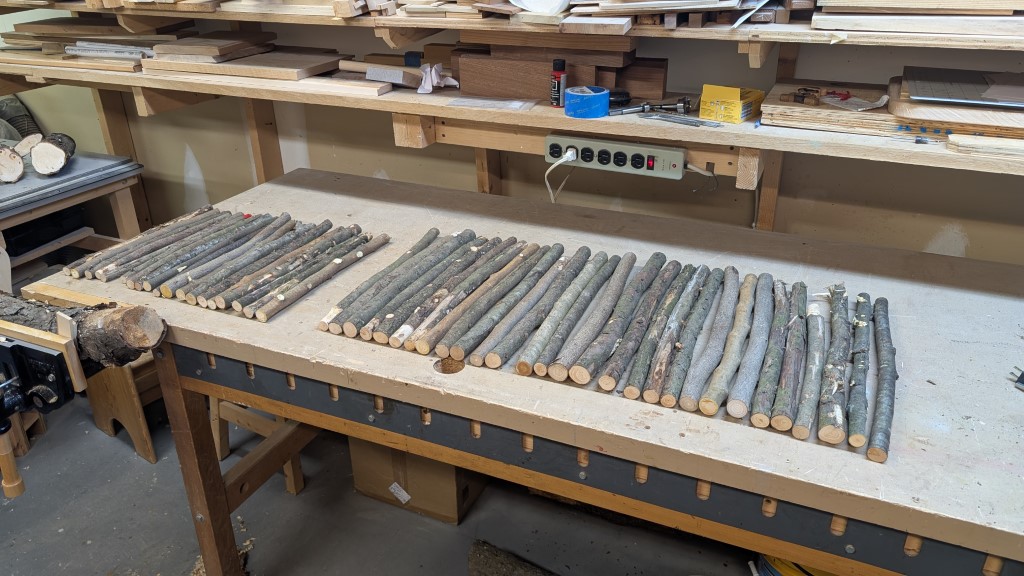
I decided that the build process would begin with the legs – the foundation of the deer if you will. After a little futzing around, I concluded that it would be most productive to prepare a bunch of legs at the same time, cutting them to length and then arranging by diameter as well as appearance. For example, legs made from the same wood species or that had similar curves, or that just looked like they belong together for whatever reason, were laid out next to each other. I went with two leg lengths: 16″ and 19″.
Once four matching legs were identified, the next step was to drill leg holes in the log torso. I wanted the legs to be splayed out or angled to provide better stability so I created a jig to theoretically speed up the process and ensure that all holes were drilled at the same angle. Unfortunately, it didn’t go as planned: it was tricky keeping the jig in place on an irregular log surface which resulted in holes that didn’t quite line up with each other. Furthermore, the pilot holes in the jig were a fixed 7/8″ diameter so I couldn’t use the jig with larger diameter legs. So, I ended up going with the simpler free-hand drilling approach. I do think I was on the right track with the jig and if I decide to make more Rudy’s in the future, I have a few ideas in mind for improvements.
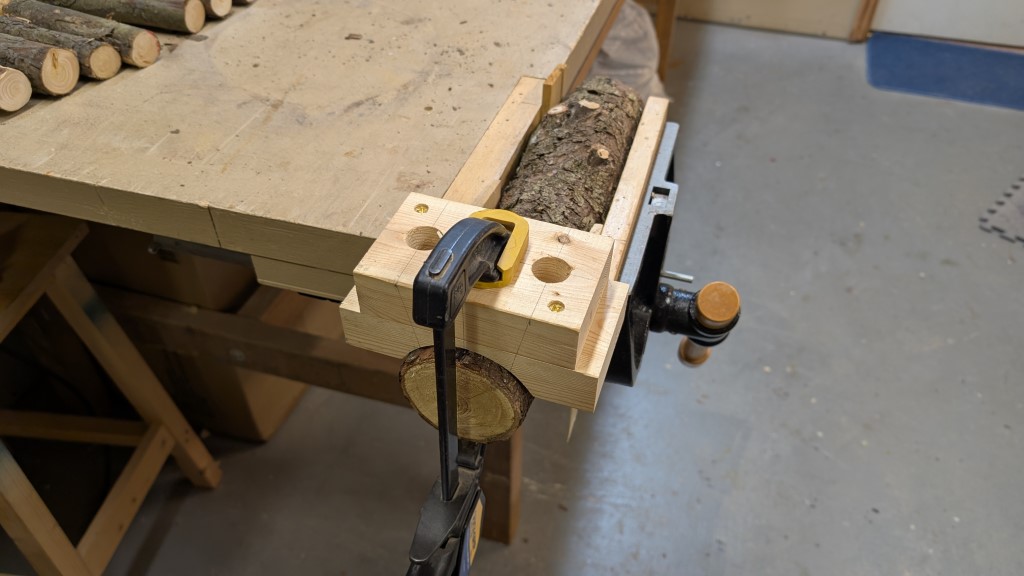
For the freehand drilling of the leg holes, I marked out drill holes that were set back about 2″ from each end of the log and 1-1/4″ on either side of a center line, resulting in holes that were 2-1/2″ apart from each other on each end. The holes were then drilled with a 7/8″ or 1″ spade bit using a hand held drill. I eyeballed the drill angle in an attempt to be as consistent as possible – this worked well enough in most cases although there were a couple reindeer that had a peculiar looking stance… I didn’t actually measure the leg angles, I just shot for the “hooves” on each end being 10″ to 12″ apart from each other with the reindeer in the standing position.
After the leg holes were drilled, the next challenge was getting the legs to fit into the holes. This was perhaps the most time-consuming process in the assembly line. As you may be aware, tree branches are not perfectly round, so it took some chiseling, sanding, etc. to make each leg round enough on one end to fit into the nice round holes. In some cases, I slightly elongated the hole with the drill bit which is actually quicker than shaving down the upper 2″ or so of the leg. If I get more serious about reindeer production in the future, I’m definitely going to buy a log tenon cutter which is what log furniture makers use to shave down log ends to create uniformly sized spindles and rails.
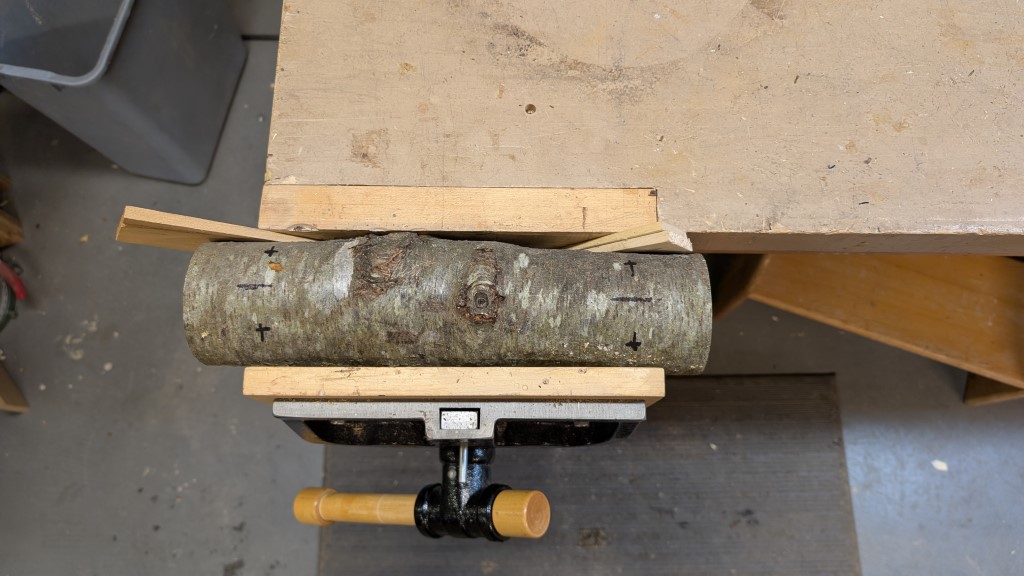
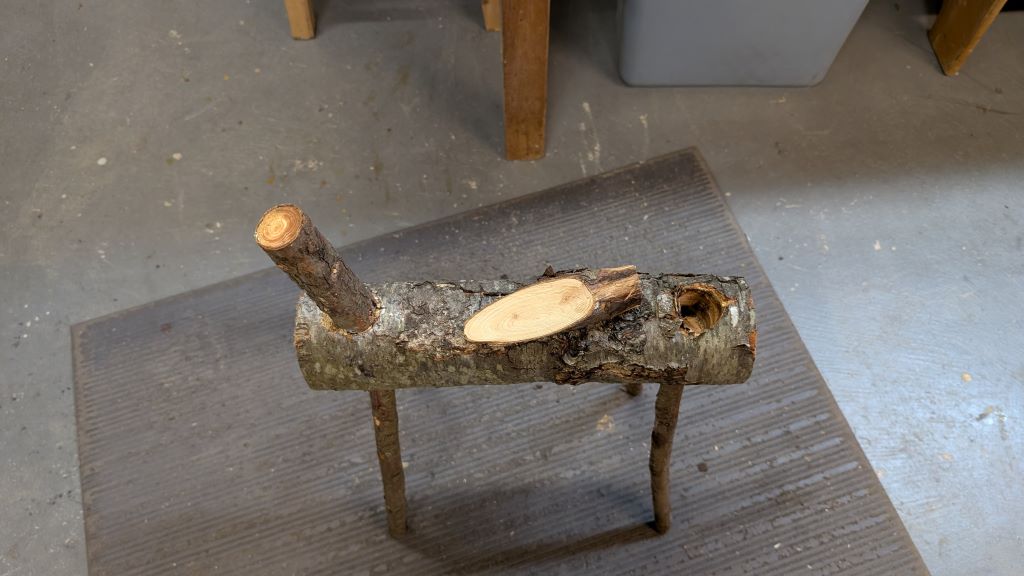
I drilled 1-1/4″ or 1-1/2″ diameter holes for the the neck and tail. I angled the holes slightly so the neck and tail were tilted away from the main body. Again, I just eyeballed these angles. Note that although the drill is tilted towards the body in this photo, the hole is actually angled in the opposite direction.
Like the legs, it typically required some trimming to fit the neck and tail into the mounting holes. Again, a log tenon cutter would have come in handy here. In some cases, the pieces were a bit undersized so I used small pieces of wooden wedges to fill in the gaps.
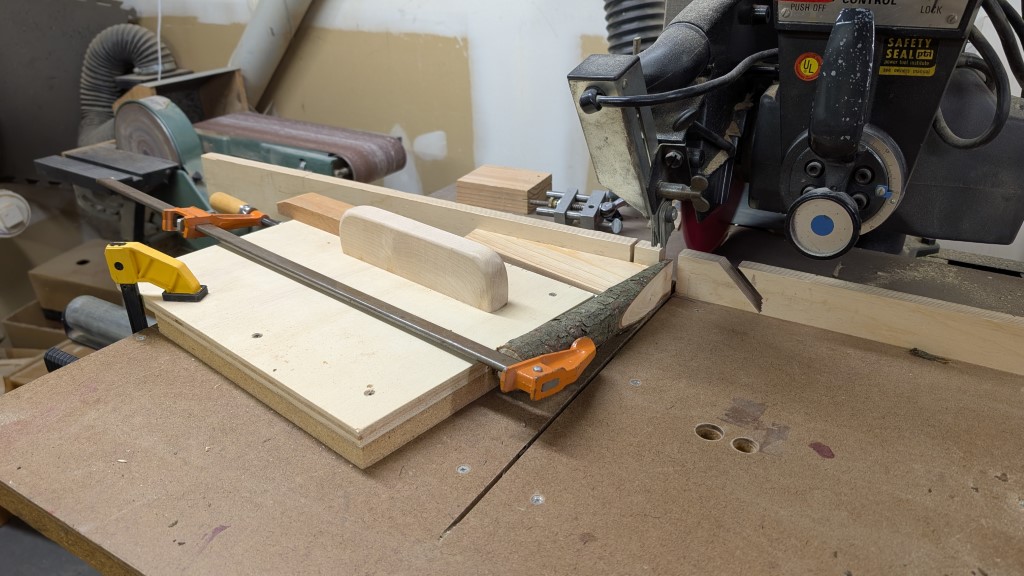
The ears were made by making an angled cut lengthwise along a branch to produce an exposed area about 5″ long. I used branch pieces that were 1-1/4′ to 1-1/2 in diameter by 8″ long. Initially, I used my radial arm saw with a simple angled jig, as shown in the photo, to make the angled cuts. After several deer were produced, I switched to using the band saw to make these cuts because I found it to be simpler and safer. Just mark the desired cut line on the ear stock and cut along the line. The main thing here was to angle the cut such that the blade made initial contact on the edge of the stock in order to produce a rounded rather than a flat ear top.
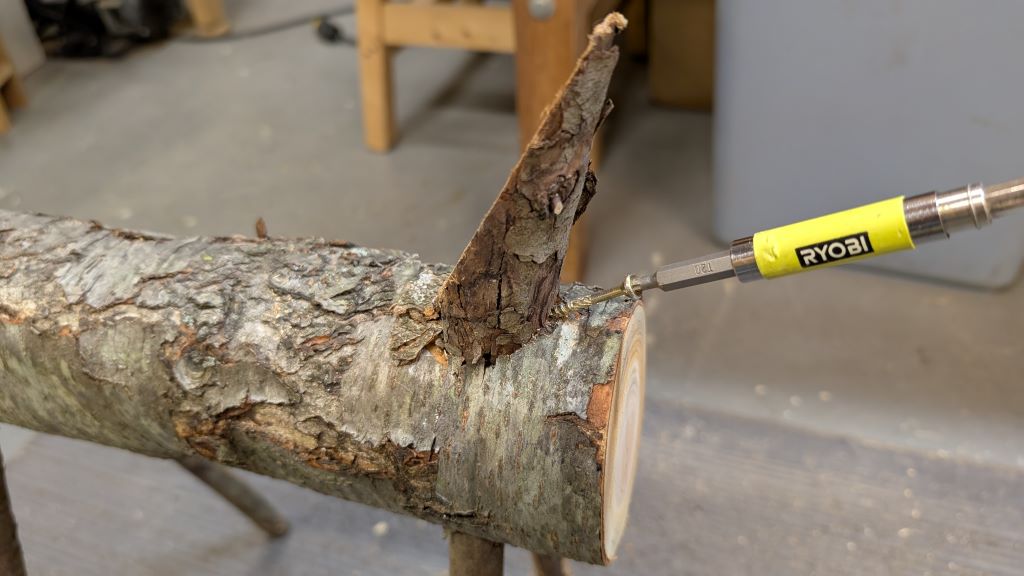
All of the body parts with mounting holes (legs, neck, tail, ears) were secured with 2″ screws driven in at angle – toe “nailed” screws if you will. The metal screws were the only non-wood components in these reindeer. And yes, I realize that the exposed light colored side of the tail could/should have been facing rearward to render a more anatomically correct “Rudolph” but I liked the angled white tail look when viewing the deer from the front. I should also mention that real reindeer don’t have white tails. These were my reindeer so I made the tails my way – you know, artistic license.
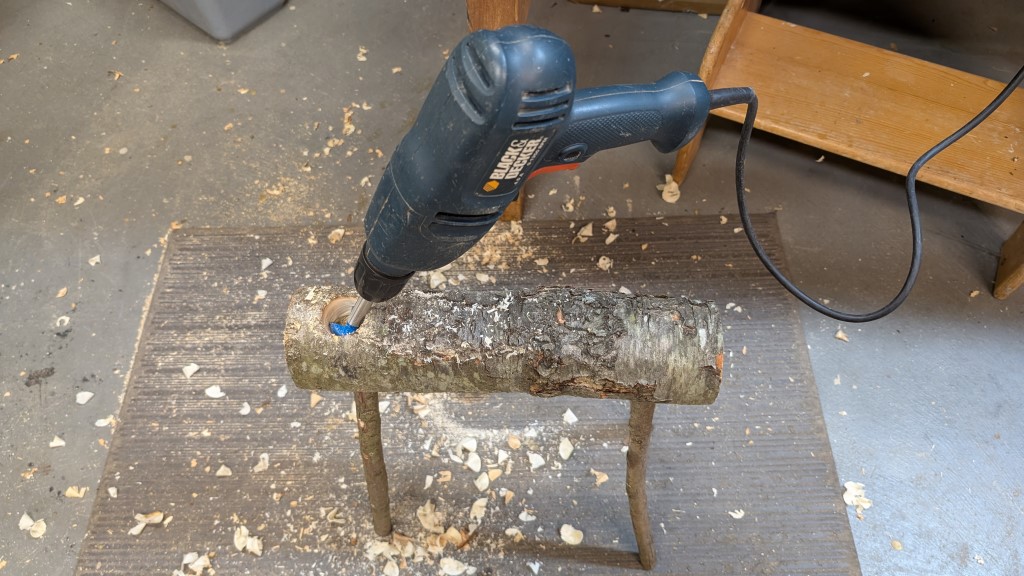
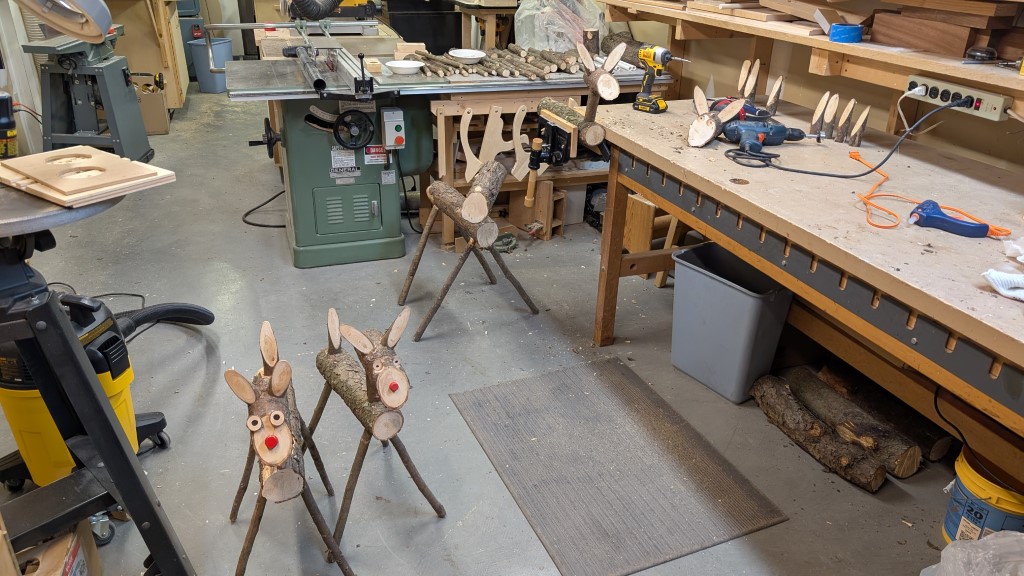
As the reindeer production progressed, I amassed an assortment of body parts. The ready availability of these parts made for a more productive experience since I could just grab a pre-made part without constantly switching from one task to another. Kind of like building a car. The white bowl contains eyes and noses. These were made by cutting short pieces from the end of 3/4″ to 1″ diameter branches. The eyes were about 1/4″ thick and the noses slightly thicker, around 3/8″ to 1/2″.

The reindeer heads were made by cutting the edge of a log at a 45 degree angle on my chop saw. A 1-1/2″ diameter hole was drilled on the underside back end (set back about 2″) to accommodate the neck. The neck was fastened to the head and the body with 2″ long screws in the same manner as the other parts. I varied the orientation of the reindeer heads: some were pointed straight ahead and others were tilted to the left or right side.
The eyes and ears were attached with either hot melt glue or waterproof wood glue. I found that the hot melt glue did not work very well with freshly cut logs. The wood had to be fairly dry or the hot melt glue would not stick to it at all. Some of the early deer had recessed eyes, formed by drilling into the head an inch or so with a Forstner bit. I had to drill the recess at an angle for the eyes to be pointed forward which was a bit of a challenge because the bit wanted to skip off the surface. I got to the point where I stopped doing the recess and just glued the eyes directly to the front angled surface.
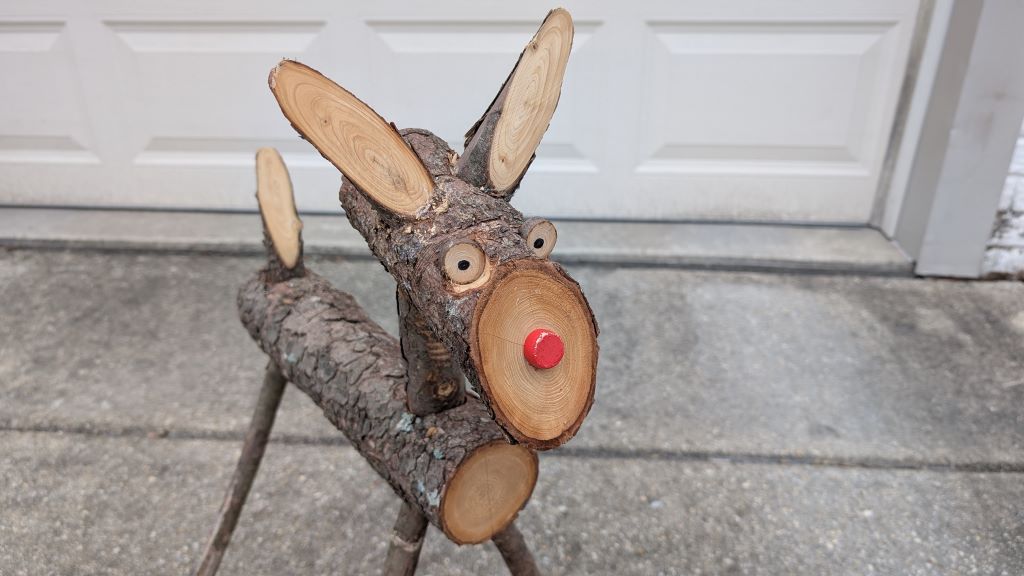
Here’s an example of one with the eyes attached directly to the front without a recess. I’m not really sure what I was thinking with the nose or oversized ears. At least he’s smiling…

Eventually, I had a bunch of bright-eyed shop apprentices watching with interest as more of their kin came off the assembly line. Fortunately they were well behaved and didn’t make too much noise.
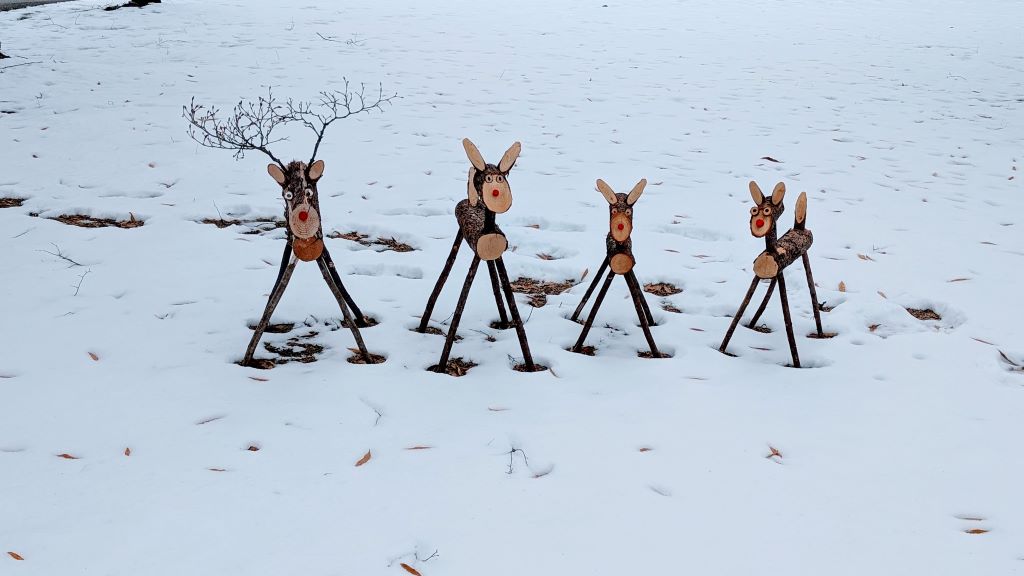
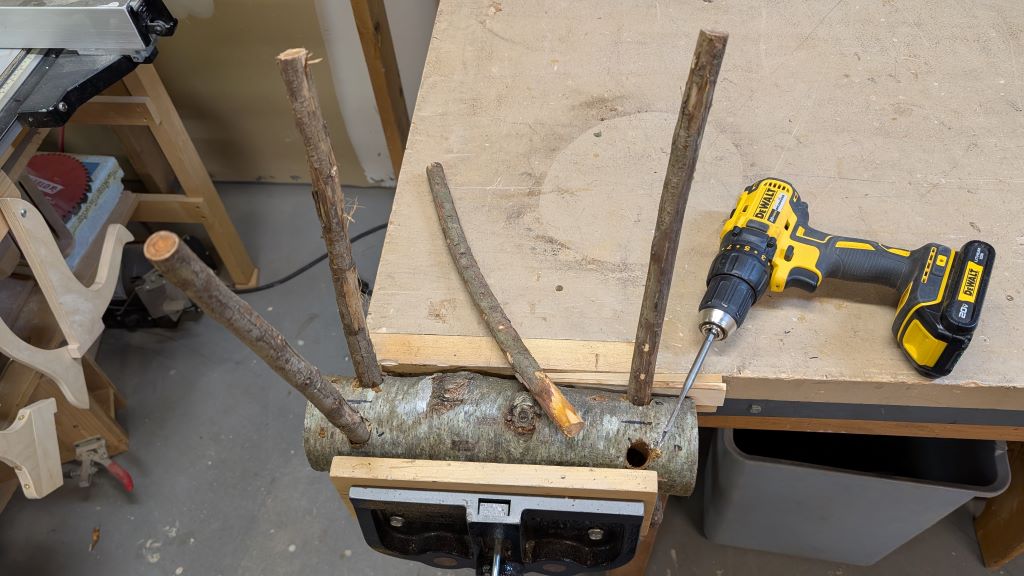
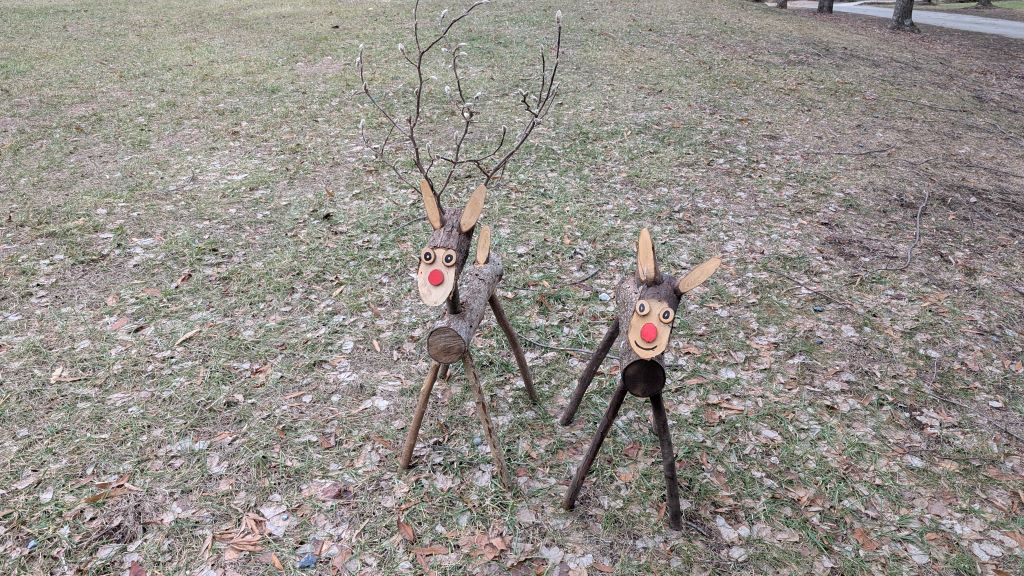
Of course, some of the reindeer had antlers. These were made by inserting carefully chosen branches into 3/8″ holes drilled right behind the ears. Trivia: did you know that both male and female reindeer can have antlers? True story.
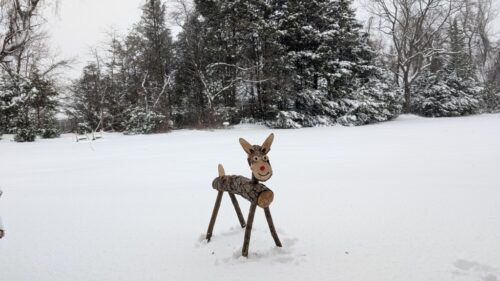
And then there was this happy arched back fella enjoying the freshly fallen snow. I actually took him to the workplace and placed him next to a the sidewalk near the building entrance. I overheard several people saying that he brightened up their day as they trudged into the office.
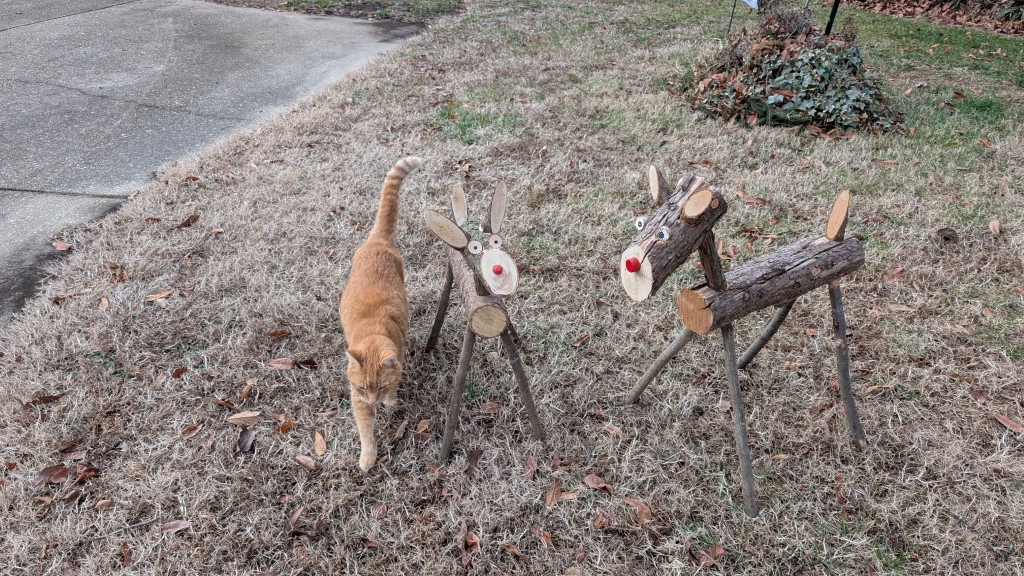
The story wouldn’t be complete without Simba the cat getting involved in the action. Here he is inspecting a couple reindeer by the driveway. The deer on the right is the original Rudy without his antlers (they shed seasonally).