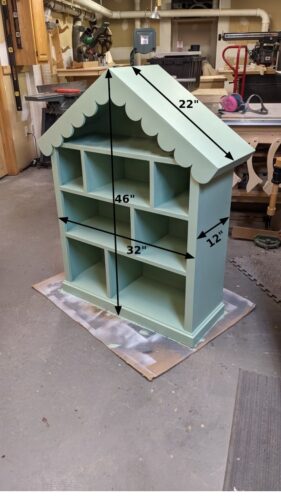
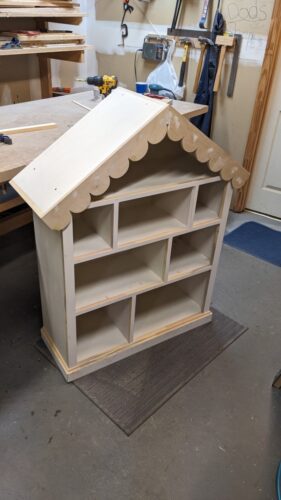
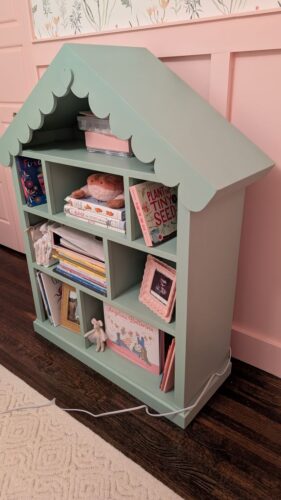
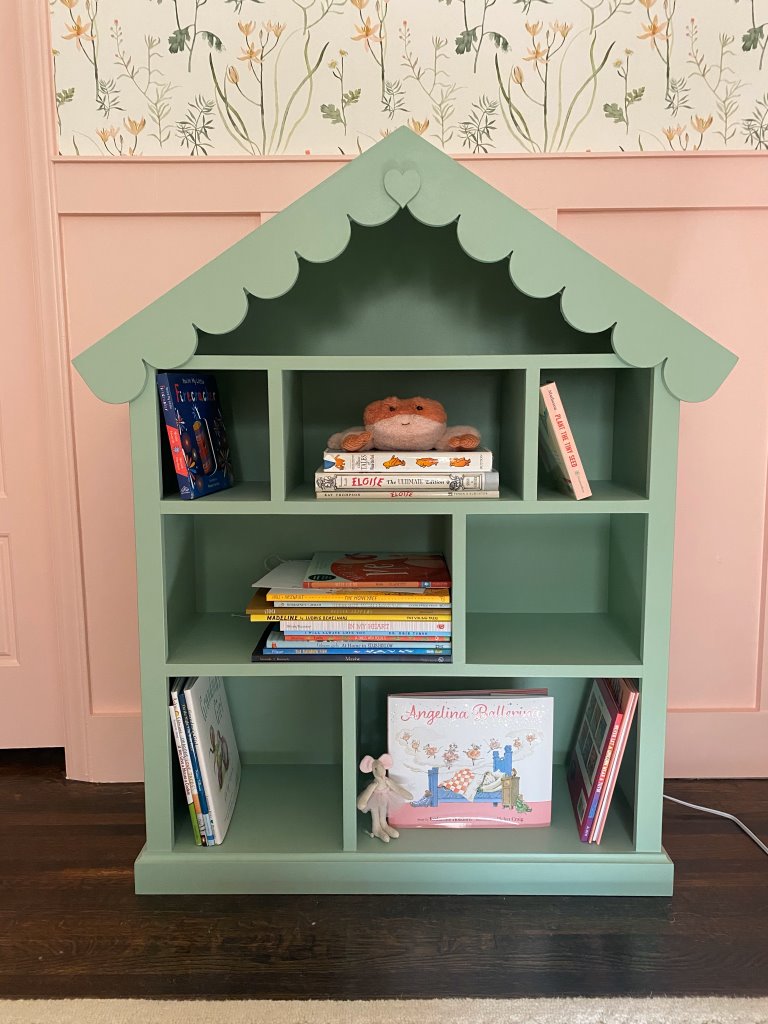
Here is a dollhouse bookcase that I was commissioned to build for my granddaughter by her parents. It’s made from 1/2″ whitewood sanded plywood that I picked up at Lowes. It’s basically very smooth, void-free plywood with a white primer coat. The side trim and base moulding are made from 3/4″ white pine. The materials cost was about $150. The overall dimensions are 46″ high, 32″ wide, and 12″ deep.
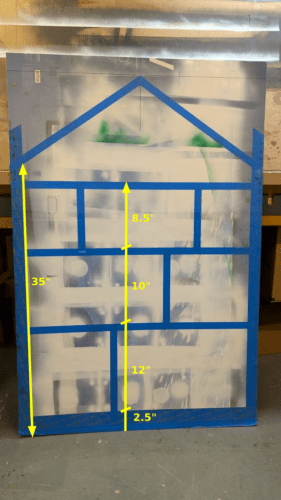
I opted for the old school method of cardboard and painter’s tape to design a full-scale layout of the bookcase. This made it fairly easy to come up with shelf spacing, vertical divider locations, and the roof pitch (34 degrees). Another nice feature of the cardboard mockup was that I could use it to directly mark the angled cut on the wall tops as well as the shelf back panel.
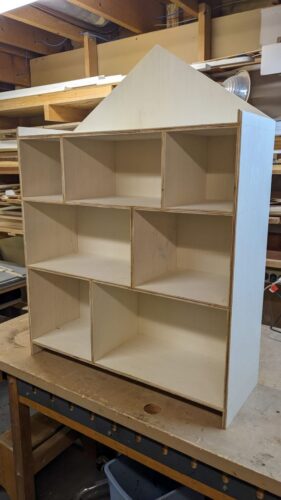
I first ripped all the side walls, shelf and divider panels to width using the table saw. The side pieces are 12″ and the shelves and dividers are 11-1/2″. I then proceeded to cut 1/4″ deep dadoes (also with the table saw) for the shelf ends and the dividers between the shelves. A 1/4″ deep by 1/2″ wide rabbet was cut along the back inside edge of the two sides to accommodate the recessed back panel. The shelves and dividers were cut to length, taking into account the extra 1/2″ taken up by the bottom and top dadoes. The top edge of each side wall was cut at a 34 degree angle to match the roof pitch. The unit was dry-assembled and held in place with clamps in order to measure the dimensions of the back panel which was also made from 1/2″ plywood. After ripping the panel to width (31-1/2″), I marked a center line on the top end, laid the clamped together unit on top of it, and used a straight edge to extend the angles on the sides to the center line. It was then a simple matter of making the angled cuts with my track saw.
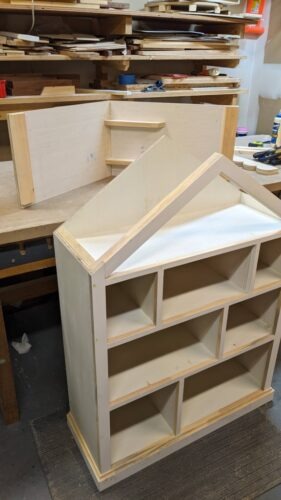
The bookcase panels were fastened together with woodworking glue and 2″ long brad nails using a pneumatic brad nailer. Nothing too fancy. After nailing together the shelf carcass, I attached the back panel to square up the whole unit. Several parallel and pipe clamps helped keep the joints tight. Trim pieces made from 3/4″ white pine were used along the sides, the front edges of the shelves/dividers, and the base moulding. These pieces covered the plywood edges and also added a little extra rigidity to the shelves. They were also glued and brad nailed in place. After attaching the front trim pieces, a front roof frame was added. I used the angled back panel as a template to cut the front frame pieces to the appropriate length and angle. This basically involved laying each front piece against the back panel and marking cut lines to match the angles at the top and side.
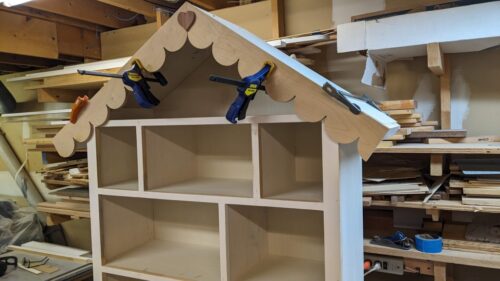
For the scalloped trim, I found something on Etsy that I thought would work. However, it was made from rather thin 1/4″ MDF and I had doubts about its long-term survival. You know how kids can be with books they don’t like. So, I decided to use that material as a template to create DIY scalloped trim using some left-over 1/2″ Baltic-birch plywood. This involved taping the purchased trim on top of the plywood with double-sided tape and then routing it out with a 1/8″ pattern router bit. Because of the bit thickness, the indentation where the scallops meet formed more of a small half circle rather than a distinct point but I thought it looked pretty good and so far no one has complained. Another custom touch was a center heart that I cut out from 1/4″ cedar using my scrollsaw.
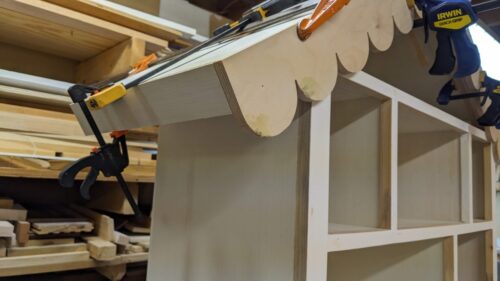
The roof was made from two 12″ wide by 23″ long panels cut at a 34 degree angle where they join in the center. It was attached to the bookcase using glue, screws, and nails. After adding scalloping and side fascias, the roof was topped off with a thin sheet of luan plywood to cover up screw holes, nail holes, joints, etc. It wasn’t strictly necessary but I think it cleaned things up and enhanced the spiffiness factor.
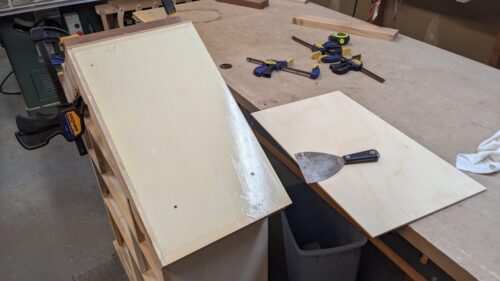
I filled in all the nail holes with wood putty and gave the whole unit a good sanding once the putty dried. This included rounding off the sharp edges. This was a bit of work for the shelf and divider trim pieces, which were 1/4″ wider than the 1/2″ panels they covered because I had to make sure the hidden protruding back edges were adequately smoothed off. If I made another dollhouse bookcase, I would be inclined to use 3/4″ thick material rather than 1/2″ so the trim pieces would be the same width as the panels, resulting in less sanding.
The final steps were to glue on the center heart and give the bookcase a couple coats of mint green semi-gloss paint. The color was specified in the “contract”. The finished product was delivered on time, installed in the baby’s room, and promptly populated with an assortment of quality children’s books. No customer complaints so far…


